


Native App Print for Android
How to add and build a Library
1. Embedding the Library and Running the Sample Application.
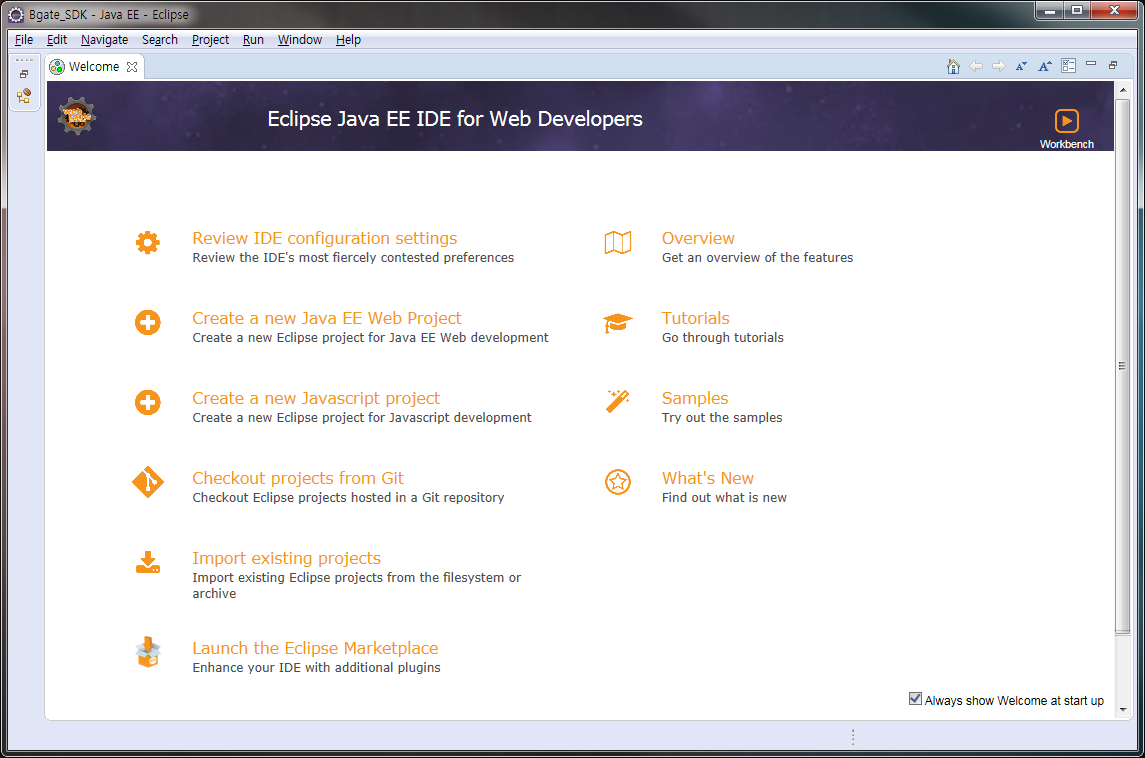
• Run Eclipse.
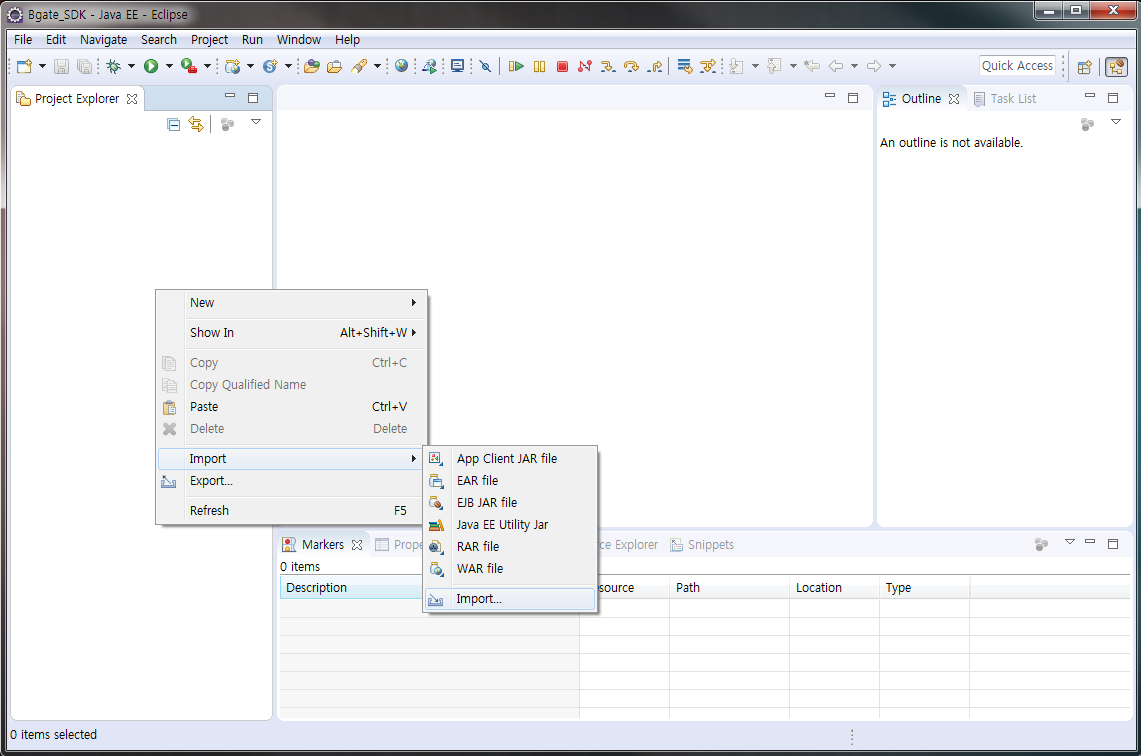
• Select File - Import.
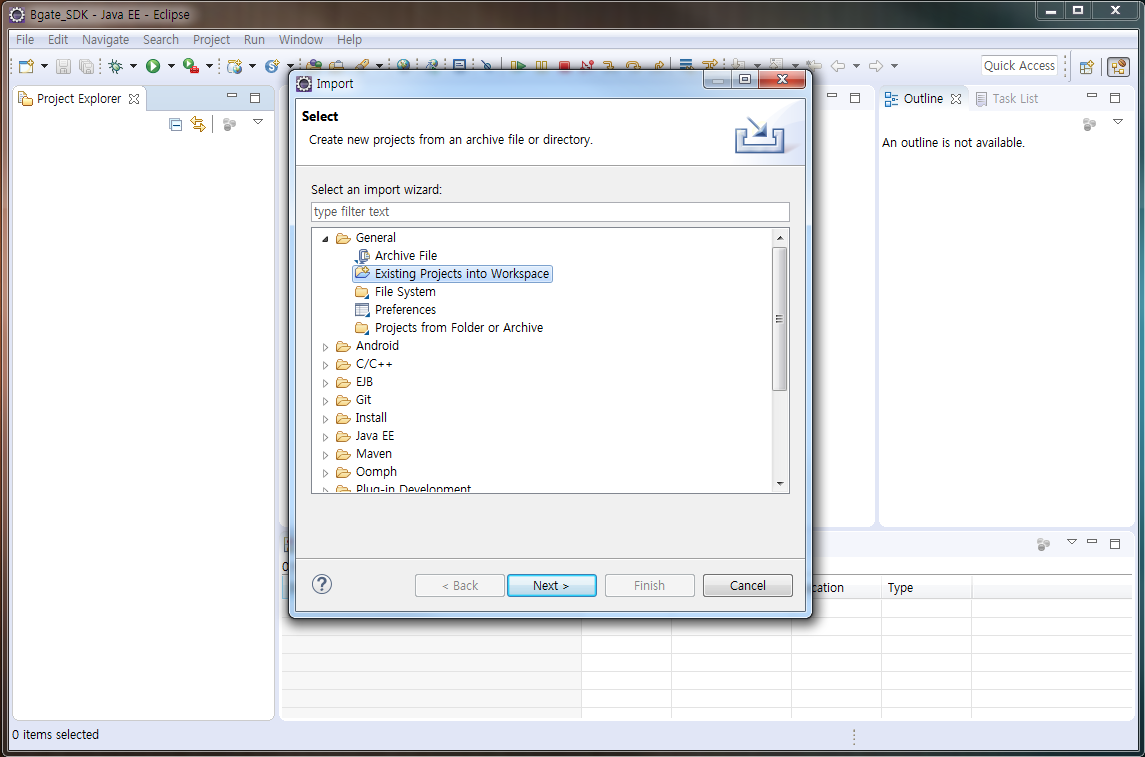
• Select General - Existing Project into Workspace.
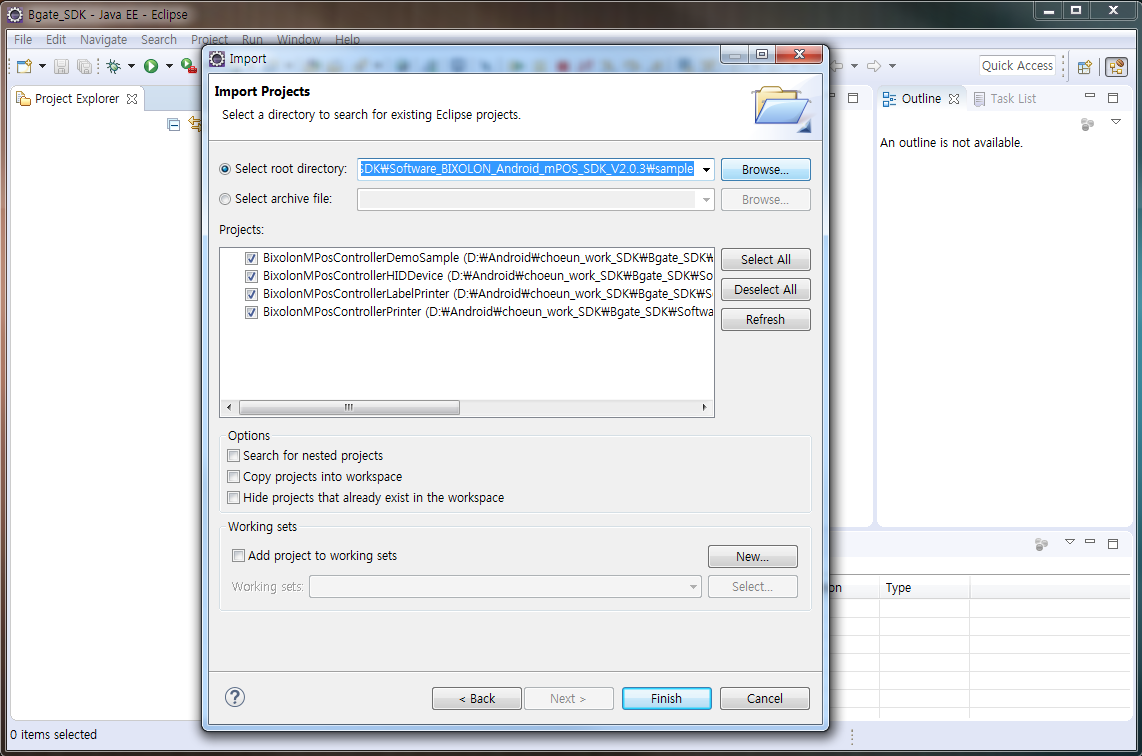
• Select Browse to specify the path to the sample project.
• Drag the SDK - lib - BixolonmPosVxxx.jar file that was downloaded beforehand and add it to the sample project lib folder.
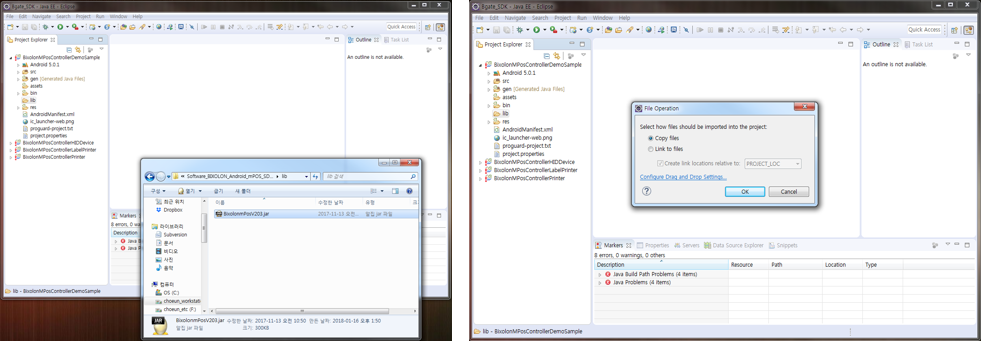
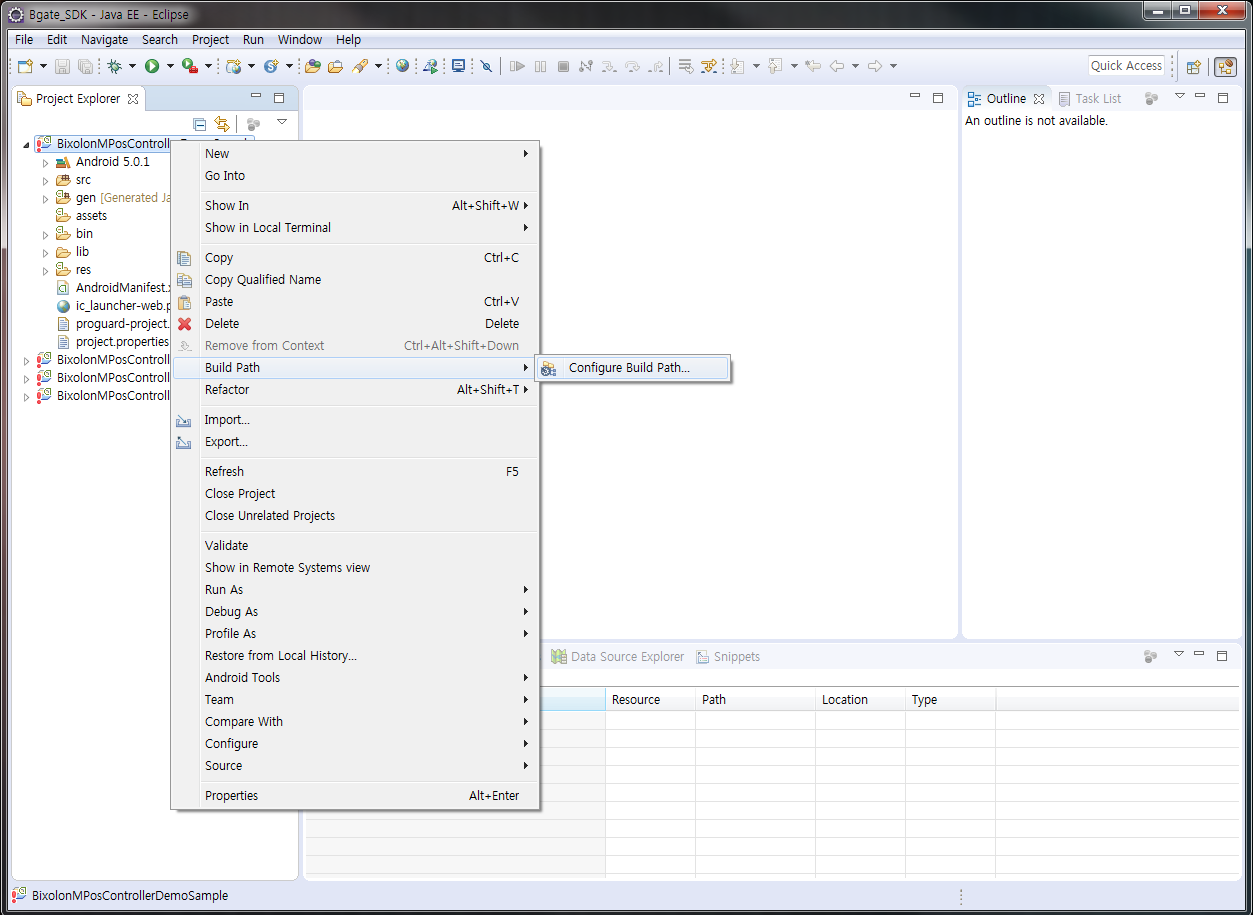
• To set the build path of the added .jar file, select Sample Project - right mouse click – Build Path – Configure Build Path.
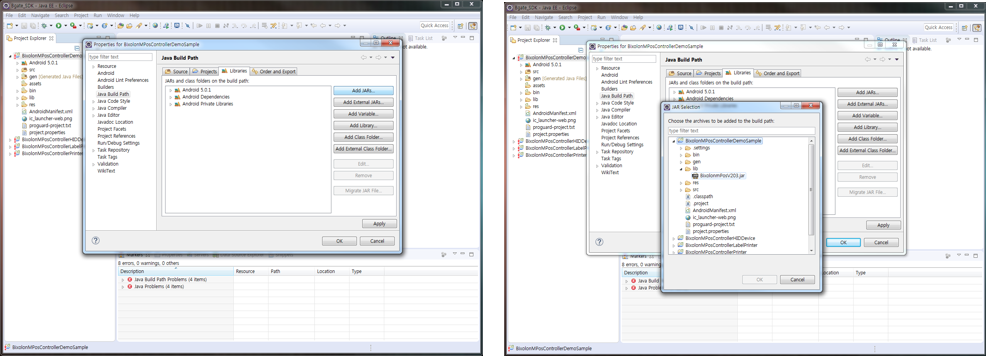
• Select "Add JARs" on the libraries tab, and select the lib - BixolonmPosVxxx.jar file in the sample project.
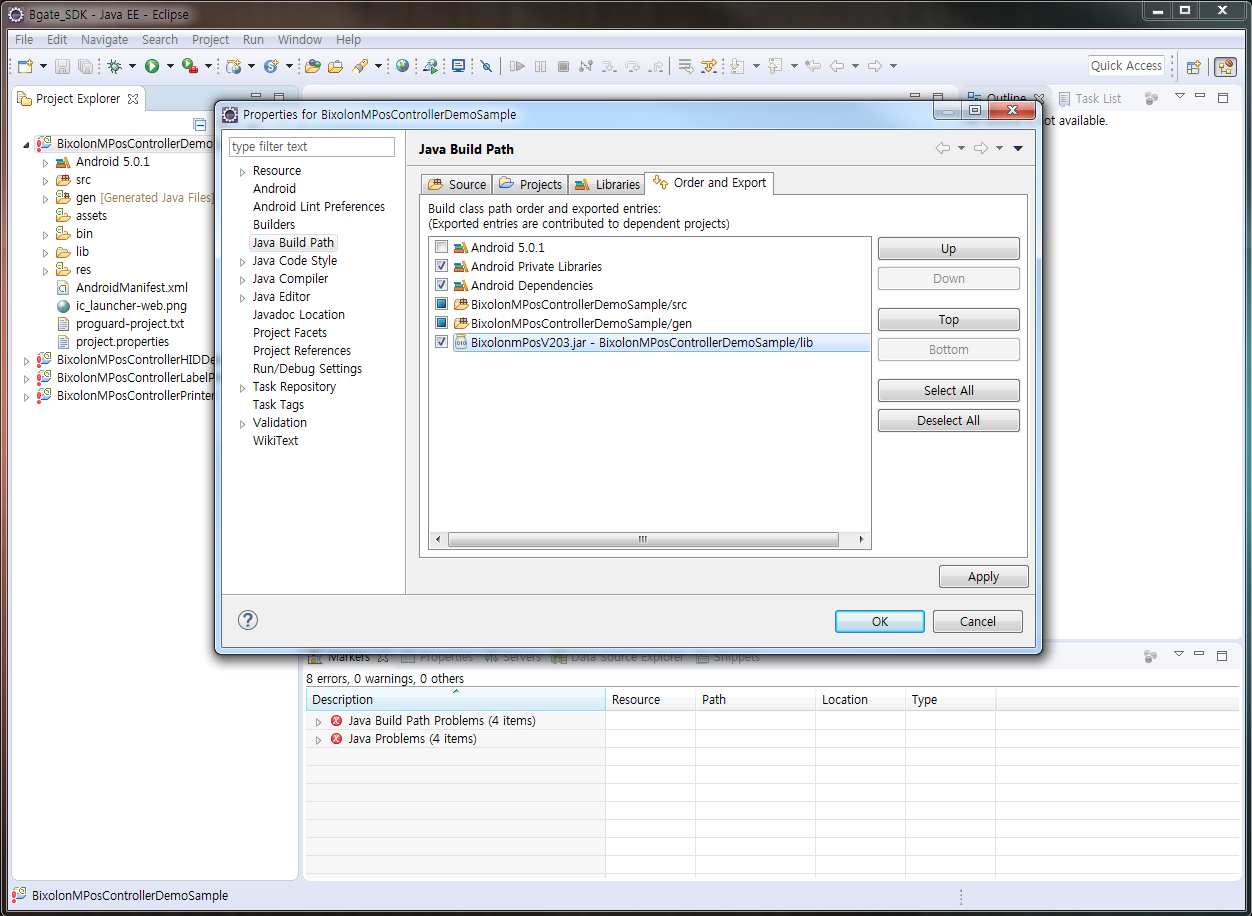
• Select Order and Export and activate the checkbox of the added BixolonmPosVxxx.jar file.
(If the error disappears from the project, it means that the sample project and library have been normally imported.)
2. Running / Debugging Project
• Select Project - Run/Debug.

Sample App Download
Sample App Download for AndroidSample Code
SDK Download for AndroidOverview
In order to use a sample, the appropriate Interface configurations will be needed in the B-Gate allocating where each sample program will connect to.
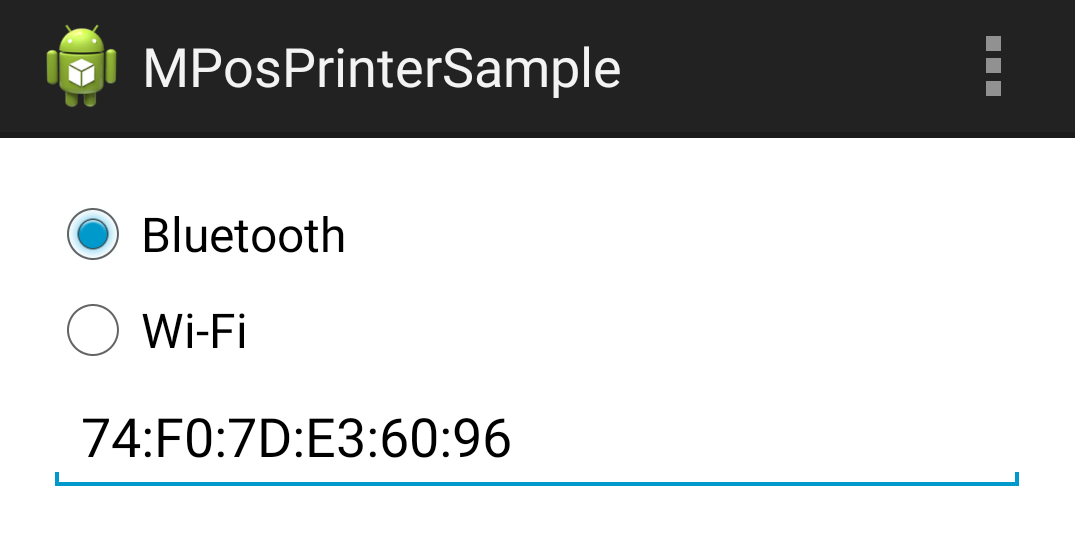
When connecting Via Bluetooth, select Bluetooth and then enter the Mac address of the host. When connecting Via Wi-Fi, select Wi-Fi and then enter the IP address of the B-gate.
|
Caution |
Please refer to the “User Manual” for details on how to check the B-gate’s assigned IP address or the Mac address of Bluetooth. |
Below are the Class names of each device.
|
Device types |
Class name |
|
Label Printer |
MPosControllerLabelPrinter |
|
POS Printer |
MPosControllerPrinter(including B-gate solid-type printer) |
|
HID |
MPosControllerHID |
|
MSR |
MPosControllerMSR |
|
Barcode Scanner |
MPosControllerScanner |
|
RFID |
MPosControllerRFID |
|
Dallas Key |
MPosControllerDallasKey |
|
NFC |
MPosControllerNFC |
|
Customer Display |
MPosControllerBCD |
|
USB-to-Serial |
MPosControllerTTYUSB |
|
Scale |
MPosControllerScale |
1 Preparing to Use B-gate Device
An initializing process is needed to use a B-gate device.
This is a sample of a Printer device.
|
public MPosControllerPrinter mPosPrinter = new MPosControllerPrinter(); if(InterfaceTypeBT){ mPosPrinter.selectInterface(BixolonConst.MPOS_INTERFACE_BLUETOOTH, strAddress); }else{ mPosPrinter.selectInterface(BixolonConst.MPOS_INTERFACE_WI-FI, strAddress); } //mPosPrinter.selectCommandMode(BixolonConst.MPOS_COMMAND_MODE_BYPASS); //mPosPrinter.setTimeout(3); int nRet = mPosPrinter.openService(this); if(nRet != BixolonConst.MPOS_SUCCESS){ //open fail } //open success |
* strAddress in the selectInterface function is the actual address value.
1) If the BT address of the B-gate connected and paired with Bluetooth is “74:F0:7D:E3:60:96”
|
mPosPrinter.selectInterface(BixolonConst.MPOS_INTERFACE_BLUETOOTH, 74:F0:7D:E3:60:96); |
2) If Wi-Fi is connected and the IP address of B-gate is ‘192.168.0.1’
|
mPosPrinter.selectInterface(BixolonConst.MPOS_INTERFACE_WIFI, 192.168.0.1); |
* When connecting a device, the selectCommandMode function is used to select whether to connect directly or through B-gate. This can be left out if connecting through B-gate.
When calling the function, you can use ‘MPOS_COMMAND_MODE_DEFAULT’
If connecting a device directly, you must call ‘MPOS_COMMAND_MODE_BYPASS’.
|
mPosPrinter.selectCommandMode(BixolonConst.MPOS_COMMAND_MODE_BYPASS); |
Refer to the gate SDK manual for devices that can connect directly to gate.
* The setTimeout function is to configure the time limit on how long openService runs.
If the function is not used, the default value is 3 seconds. When using, the value unit is in ‘seconds (sec)’.
|
mPosPrinter.setTimeout(3); |
* The openService function forms an actual connection with a device, checks whether or not the device can be used, and then returns a result value.
|
mPosPrinter.openService(this); |
If 2 or more of the same type of device is used, the openServiceById() function can be used.
|
mPosPrinter.openService(11); |
2 Ending Use of B-gate Device
You must finish and close a B-gate device. Please refer to the example below.
|
mPosPrinter.closeService(0); |
For the closeService function’s parameters, you can enter the appropriate time required if more time is needed to send the data remaining in the transmission buffer when closing a device. The value unit is in ‘seconds (sec)’.
Print Sample
This sample shows how to use a printing device. The sample is made of Print, Check Status, and Pagemode.

1 Print
Print Sample prints and cuts texts/barcodes/image files.
|
//initilize mpos. mPosPrinter.printText("mPos Android SDK Sample\n", fontAttributes); mPosPrinter.print1dBarcode("1234567890123456", BixolonConst.MPOS_BARCODE_CODE128, 2, 80, BixolonConst.MPOS_ALIGNMENT_CENTER, BixolonConst.MPOS_BARCODE_TEXT_BELOW); BitmapDrawable drawable = (BitmapDrawable) getResources().getDrawable(R.drawable.bixolon); Bitmap bitmap = drawable.getBitmap(); mPosPrinter.printBitmap(bitmap, 350, BixolonConst.MPOS_ALIGNMENT_CENTER, 20, true, true); mPosPrinter.cutPaper(BixolonConst.MPOS_PRINTER_FEEDCUT); //finalize mpos. |
Texts are printed using printText while text attributes can be configured with the FontAttribute.
Please refer to item 5-5-4-2 Printer Sample - 2 FontAttribute for examples of FontAttribute.
Please refer to item 5-5-4-2 Printer Sample - 3 ESC Sequence for examples of ESC Sequence.
Barcode prints the Code128 barcode. To print other types of barcodes, change the second parameter of the print1DBarcode function, which is the symbology value.
Please refer to the B-gate SDK manual for the constant values defined according to each type.
To change the width of a barcode, change the 4th parameter, which is the barWidth value.
The path of the image ‘res – “bixolon.png”‘ file in the example is configured as the relative path.The image width is the value that prints the image at the same size as the original image file.To change the image width before printing, enter the desired value in the second parameter.
2 FontAttribute
Font attributes that can be configured using the FontAttribute are font type, font size (scale unit), bold, underline, reverse, and align. When encoding additional character strings, you can configure the values being used.
1) Configure ‘font type’ using FontAttribute in the printText function (default value: Font A)
|
FontAttribute fontAttributes = new FontAttribute(); fontAttributes.setFontType(BixolonConst.MPOS_FONT_TYPE_A); mPosPrinter.printText("mPos Android SDK Sample\n", fontAttributes); |
2) Configure ‘font size’ using FontAttribute in the printText function (default value: width times 1, height times 1)
|
FontAttribute fontAttributes = new FontAttribute(); fontAttributes.setFontSize(BixolonConst.MPOS_FONT_SIZE_WIDTH_1| BixolonConst.MPOS_FONT_SIZE_HEIGHT_1); mPosPrinter.printText("mPos Android SDK Sample\n", fontAttributes); |
3) Configure ‘bold’ using FontAttribute in the printText function (default value: normal)
|
FontAttribute fontAttributes = new FontAttribute(); fontAttributes.setBold(true); mPosPrinter.printText("mPos Android SDK Sample\n", fontAttributes); |
4) Configure ‘underline’ using FontAttribute in the printText function (default value: no underline)
|
FontAttribute fontAttributes = new FontAttribute(); fontAttributes.setUnderline(true); mPosPrinter.printText("mPos Android SDK Sample\n", fontAttributes); |
5) Configure ‘reverse’ using FontAttribute in the printText function (default value: normal)
|
FontAttribute fontAttributes = new FontAttribute(); fontAttributes.setReverse(true); mPosPrinter.printText("mPos Android SDK Sample\n", fontAttributes); |
6) Configure ‘reverse’ using FontAttribute in the printText function (default value: normal)
|
FontAttribute fontAttributes = new FontAttribute(); fontAttributes.setAlignment(BixolonConst.MPOS_ALIGNMENT_LEFT); mPosPrinter.printText("mPos Android SDK Sample\n", fontAttributes); |
7) Set the value of ' textEncoding ' using the FontAttribute function in the printText function
The default value is PC437.
|
FontAttribute fontAttributes = new FontAttribute(); fontAttributes.setTextEncodeing(437); mPosPrinter.printText("mPos Android SDK Sample\n", fontAttributes); |
3 ESC Sequence
Font attributes that can be configured using ESC Sequence are font type, font size (scale unit), bold, underline, reverse, and align. Attributes configured with ESC Sequence will apply only to character strings included when the function is called.
Once the function call ends, the attributes will automatically initialize. The ‘textEncoding’ attribute of FontAttribute is not supported in ESC Sequence. To change the character string encoding value, the setTextEncoding function must be used.
The ESCAPE_CHARACTERS variables used in the sample is “\x1b, \x7c” value.
1) Configure ‘font type’ attribute using ESC Sequence in the printText function
ESC Seq : ESCAPE_CHARACTERS + “aM”(Font A, default value),
ESCAPE _CHARACTERS + “bM” (Font B),
ESCAPE _CHARACTERS + “cM” (Font C)
|
mPosPrinter.printText(ESCAPE_CHARACTERS + "aM" + "mPOS print test" + "\n", null); |
2) Configure ‘font size’ attribute using ESC Sequence in the printText function
ESC Seq : ESCAPE_CHARACTERS + "1C" (width times 1, default value),
ESCAPE_CHARACTERS + "2C" (width times 2),
ESCAPE_CHARACTERS + "3C" (height times 2),
ESCAPE_CHARACTERS + "4C" (width times 2, height times 2)
|
mPosPrinter.printText(ESCAPE_CHARACTERS + "4C" + "mPOS print test" + "\n", null); |
3) Configure ‘bold’ attribute using ESC Sequence in the printText function
ESC Seq : ESCAPE_CHARACTERS + "bC" (configure),
ESCAPE_CHARACTERS + "!bC"; (cancel, default value)
|
mPosPrinter.printText(ESCAPE_CHARACTERS + "!bC" + "mPOS print test" + "\n", null); |
4) Configure ‘underline’ attribute using ESC Sequence in the printText function
ESC Seq : ESCAPE_CHARACTERS + "uC" (configure),
ESCAPE_CHARACTERS + "!uC" (cancel, default value)
|
mPosPrinter.printText(ESCAPE_CHARACTERS + "!uC" + "mPOS print test" + "\n", null); |
5) Configure ‘reverse’ attribute using ESC Sequence in the printText function
ESC Seq : ESCAPE_CHARACTERS + "!rvC" (configure),
ESCAPE_CHARACTERS + "!rvC" (cancel, default value)
|
mPosPrinter.printText(ESCAPE_CHARACTERS + "!rvC" + "mPOS print test" + "\n", null); |
6) Align using ESC Sequence in the printText function
ESC Seq : ESCAPE_CHARACTERS + "lA" (align left, default value),
ESCAPE_CHARACTERS + "cA" (align at center),
ESCAPE_CHARACTERS + "rA" (align right)
|
mPosPrinter.printText(ESCAPE_CHARACTERS + "cA" + "mPOS print test" + "\n", null); |
These are additional descriptions of configurable attributes in ESC Sequence.
7) Cut using ESC Sequence in the printText function
ESC Seq : ESCAPE_CHARACTERS + "[0-9]*P" (cut in place),
ESCAPE_CHARACTERS + "[0-9]*fP" (cut after feeding)
|
mPosPrinter.printText(EscapeSequence.ESCAPE_CHARACTERS + "9fP", null); |
8) Feed using ESC Sequence in the printText function
ESC Seq : ESCAPE_CHARACTERS + "[0-9]*lF"(5 line feeding, line unit feeding as much as number)
|
mPosPrinter.printText(EscapeSequence.ESCAPE_CHARACTERS + "5lF", null); |
9) Initialize attributes using ESC Sequence in the printText function
ESC Seq : ESCAPE_CHARACTERS + "N"
|
mPosPrinter.printText(EscapeSequence.ESCAPE_CHARACTERS + "N", null); |
4 Check Status
Use the checkPrinterStatus function to check the current status of the printer.
|
//initilize mpos. … int status = mPosPrinter.checkPrinterStatus(); //finalize mpos. |
Please refer to the B-gate SDK manual for definitions regarding returned status values.
You can check a printer’s status in real time when using the asbEnable function and StatusUpdateEvent. Please refer to item ‘4-5-2 StatusUpdateEvent registration’.
5 Pagemode
The Pagemode Sample is a sample that prints 1 image, 1 text, 1 1-D barcode, and 1 QRCode after turning them 90 degrees counter-clockwise. The cutPaper function has been added to cut the paper after printing the Pagemode contents.
The following procedure is required to use Pagemode.
1) Configure Pagemode and printing area
|
//initilize mpos. … mPosPrinter.setPageMode(BixolonConst.MPOS_PRINTER_PAGEMODE_IN); mPosPrinter.setPagemodePrintAreatArea(30, 30, 512, 700); |
2) Configure printing direction and coordinates, add content to be printed (repeat)
|
mPosPrinter.setPagemodeDirection(BixolonConst.MPOS_PRINTER_PD_RIGHT90); // Configure printing direction mPosPrinter.setPagemodePosition(10, 100); // Configure printing coordinates mPosPrinter.printBitmap(bitmap, 350, BixolonConst.MPOS_ALIGNMENT_CENTER, 20, true, true); // Add image print at coordinates right above mPosPrinter.setPagemodePosition(30, 260); // Configure printing coordinates fontAttributes = EscapeSequence.Normal + EscapeSequence.Font_A + EscapeSequence.Bold + EscapeSequence.Scale_1_time_horizontally + EscapeSequence.Scale_1_time_vertically; mPosPrinter.printText(fontAttributes + "pagemode test ", null); // Add image print at coordinates right above mPosPrinter.setPagemodePosition(30, 380); // Configure printing coordinates mPosPrinter.print1dBarcode("1234567890", BixolonConst.MPOS_BARCODE_CODE128, 2, 60, BixolonConst.MPOS_ALIGNMENT_LEFT, BixolonConst.MPOS_BARCODE_TEXT_BELOW); // Add 1D barcode at coordinates right above mPosPrinter.setPagemodePosition(220, 180); mPosPrinter.printQrCode("http://www.bixolon.com", BixolonConst.MPOS_BARCODE_QRCODE_MODEL1, BixolonConst.MPOS_ALIGNMENT_LEFT, 4, BixolonConst.MPOS_QRCODE_ECC_LEVEL_H); // Add QRCode at coordinates right above |
Only call the printing direction configuration once when you wish to change the direction.
3) Cancel after printing Pagemode
|
mPosPrinter.setPageMode(BixolonConst.MPOS_PRINTER_PAGEMODE_OUT); // Cancel after printing pagemode mPosPrinter.cutPaper(BixolonConst.MPOS_PRINTER_FEEDCUT); // Cut after feeding //finalize mpos. |
Label Print Sample
This is a sample on how to use a label printer. The printed label is made up of Vector Font, a barcode, and lines.
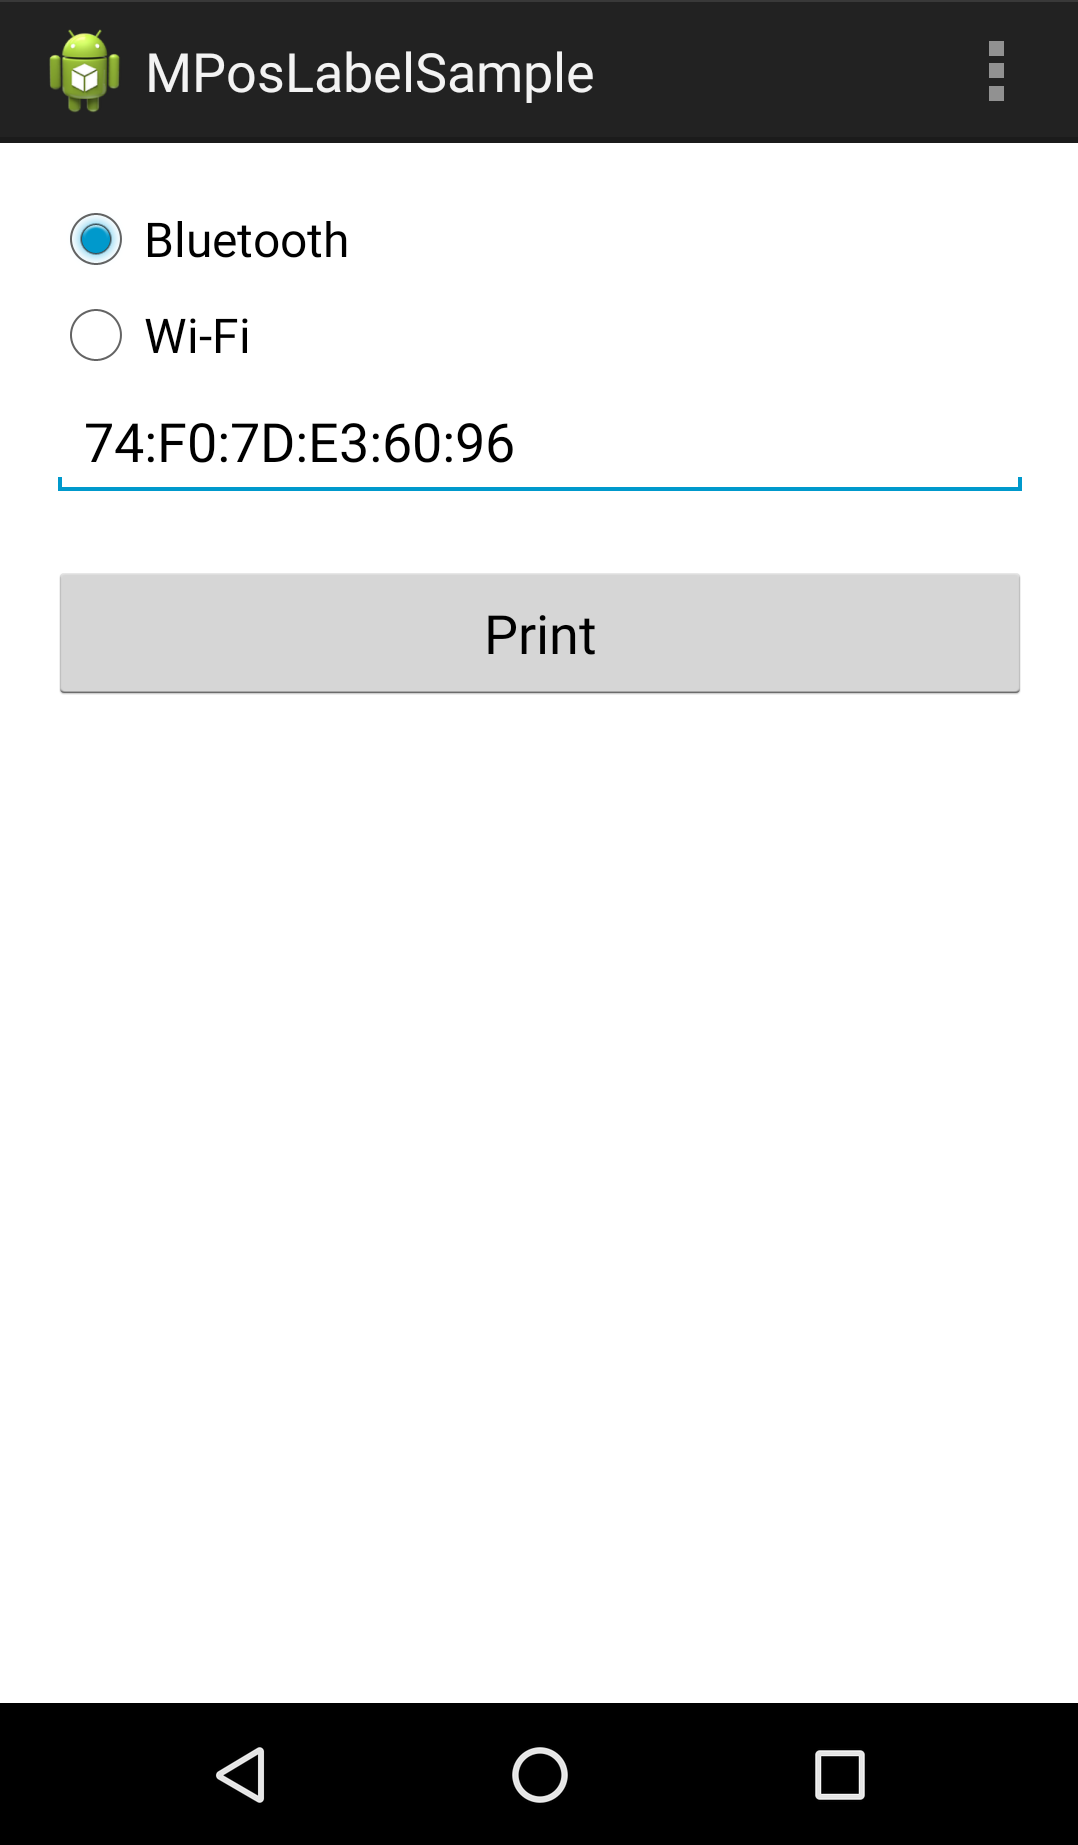
1 Label Printer Sample
The Label Printer Sample is made up of printed text/barcode/image file.
|
//initilize mpos. … mPosLabelPrinter.setLength(1200, 0, BixolonConst.MPOS_LABEL_MEDIA_TYPE_GAP, 0); // Configure label paper mPosLabelPrinter.drawBlock(40, 20, 265, 420, BixolonConst.MPOS_LABEL_DRAW_BLOCK_OPTION_BOX, 3); mPosLabelPrinter.drawBlock(164, 20, 166, 420, BixolonConst.MPOS_LABEL_DRAW_BLOCK_OPTION_LINE_OVERWRITING, 1); mPosLabelPrinter.drawTextVectorFont("mPOS Android", 50, 400, BixolonConst.MPOS_LABEL_VECTOR_FONT_ASCII, 30, 30, 0, BixolonConst.MPOS_LABEL_ROTATION_DEGREES_270, false, false, false, false, BixolonConst.MPOS_LABEL_ALIGNMENT_LEFT); mPosLabelPrinter.drawTextVectorFont("Label Sample", 90, 400, BixolonConst.MPOS_LABEL_VECTOR_FONT_ASCII, 30, 30, 0, BixolonConst.MPOS_LABEL_ROTATION_DEGREES_270, false, false, false, false, BixolonConst.MPOS_LABEL_ALIGNMENT_LEFT); mPosLabelPrinter.drawBarcodeQRCode("http://bixolon.com", 50, 150, 4, BixolonConst.MPOS_LABEL_QRCODE_MODEL_1, BixolonConst.MPOS_LABEL_QRCODE_ECCLEVEL_L, BixolonConst.MPOS_LABEL_ROTATION_DEGREES_270); mPosLabelPrinter.drawBarcode1D("1234567890123456", 170, 400, BixolonConst.MPOS_LABEL_BARCODE_TYPE_CODE128, 3, 2, 60, 3, 0, BixolonConst.MPOS_LABEL_ROTATION_DEGREES_270); mPosLabelPrinter.printBuffer(1); // Print 1 copy of contents saved in label buffer //finalize mpos. |
* The printBuffer function must be called for the label printer to print contents saved in the buffer.
|
mPosLabelPrinter.printBuffer(1); // Print 1 copy of contents saved in label buffer |
2 drawImageFile
This prints image files. It prints the “Logo.bmp” file at the coordinates (100,100).
|
BitmapDrawable drawable = (BitmapDrawable) getResources().getDrawable(R.drawable.bixolon); Bitmap bitmap = drawable.getBitmap(); mPosLabelPrinter.drawImage(bitmap, 100, 100, 300); |
3 drawBlock
This prints lines or boxes. It can draw a range of lines depending on the 5th parameter, which is the ‘option’ value. Please refer to the B-gate SDK manual for more details.
|
mPosLabelPrinter.drawBlock(40, 20, 265, 420, BixolonConst.MPOS_LABEL_DRAW_BLOCK_OPTION_BOX, 3); |
4 drawTextDeviceFont
This prints character strings as the Device font. Differently from the Vector font, the Device font’s size is predetermined and can only be adjusted by its scaling unit.
|
mPosLabelPrinter.drawTextDeviceFont("mPos Android", 350, 400, BixolonConst.MPOS_LABEL_DEVICE_FONT_10PT, 2, 2, 0, BixolonConst.MPOS_LABEL_ROTATION_DEGREES_270, false, false, BixolonConst.MPOS_LABEL_ALIGNMENT_LEFT); |
The label printer’s configurations can be changed through functions.
5 setLength
You can select the length and type of label paper.
The label printer may malfunction if the paper type is configured differently.
|
mPosLabelPrinter.setLength(1200, 0, BixolonConst.MPOS_LABEL_MEDIA_TYPE_GAP, 0); // Gap paper //or mPosLabelPrinter.setLength(1200, 0, BixolonConst. MPOS_LABEL_MEDIA_TYPE_BLACK_MARK, 0); //Black mark paper //or mPosLabelPrinter.setLength(1200, 0, BixolonConst. MPOS_LABEL_MEDIA_TYPE_CONTINUOUS, 0); // Continuous paper |
6 setWidth
This configures the label paper width. The standard position (0, 0) may change depending on the configuration values.
|
mPosLabelPrinter.setWidth(834); |
7 setMargin
This configures the left and top margins. The standard position (0, 0) may change depending on the configuration values.
|
mPosLabelPrinter.setMarginValue(50, 100); |
8 setPrintingType
This configures the Direct Thermal method and the Thermal Transfer method.
|
mPosLabelPrinter.setPrintingType(BixolonConst.MPOS_LABEL_PRINTING_TYPE_DIRECT_THERMAL); mPosLabelPrinter.setPrintingType(BixolonConst.MPOS_LABEL_PRINTING_TYPE_THERMAL_TRANSFER); |
9 Other Configurations
You can configure the printing speed, density, and direction.
|
// Printing speed mPosLabelPrinter.setSpeed(4); // Printing density mPosLabelPrinter.setDensity(10); // Printing direction mPosLabelPrinter.setOrientation(BixolonConst.MPOS_LABEL_PRINTING_DIRECTION_TOP_TO_BOTTOM); //or mPosLabelPrinter.setOrientation(BixolonConst.MPOS_LABEL_PRINTING_DIRECTION_BOTTOM_TO_TOP); |
Input Device Sample
This sample shows how to use an input device.
Input devices include MSR, Barcode Scanner, DallasKey, RFID, NFC, HID, Scale, and USB to Serial devices, and MSR, Barcode Scanner, DallasKey, RFID, NFC devices can be used in the sample. Configure the appropriate interface in the B-gate you wish to connect and select the device you wish to use.
For example, in order to use a Scanner device, click on the ‘Scanner Connect’ button and then read a barcode with the Barcode Scanner connected to the B-gate. The barcode data will then appear in the text box at the bottom.

1 HID Sample
HID Sample is a sample of how to read an input device’s data.
|
//initilize barcode scanner device. … // data event registration mPosScanner.addDataListener(this); // Once a device is closed, DataEvent cannot be received. |
The following is a sample that processes DataEvent. The inputted data length and data is printed in the text box.
|
@Override public void dataOccurred(final DataEvent e) { runOnUiThread(new Runnable() { @Override public void run() { Toast.makeText(MainActivity.this, "Data : " + new tring((byte[])e.getObject()), Toast.LENGTH_SHORT ).show(); } }); } |
B-gate Demo
This is made up of the printer, customer display, input device (Barcode Scanner), and cashdrawer device.
Selecting the ‘Printer Receipt’ button will connect the printer, customer display and the barcode scanner in that order. If the connection is a success, the total amount will appear on the customer display and a sample receipt will be printed. If a cashdrawer is connected to the printer, the cashdrawer will also open at this point. If the 1-D barcode printed on the receipt is read by the barcode scanner, the barcode data will be displayed in the sample program.

1 Character String Related Customer Display
This is a description of the function that displays and deletes character strings in the Customer Display.
1) displayString
This prints character strings on the Customer Display screen.
|
mPosCustomerDisplay.displayString(" "); |
2) clearScreen
This clears the entire Customer Display screen.
|
mPosCustomerDisplay.clearScreen(); |
2 Printer StatusUpdateEvent Registration
You can check a printer’s status in real time when using the asbEnable function and StatusUpdateEvent.
|
//initilize mpos. … //statusUpdate event registration mPosPrinter.addStatusUpdateListener(this); //finalize mpos. |
The following is a sample that processes StatusUpdateEvent. The inputted data and data are printed in the text box.
|
@Override public void statusUpdateOccurred(final StatusUpdateEvent e) { runOnUiThread(new Runnable() { @Override public void run() { if(e.getStatus() == BixolonConst.MPOS_PRINTER_ONLINE){ // printer - online }else if(e.getStatus() == BixolonConst.MPOS_PRINTER_OFFLINE){ // printer - offline }else if(e.getStatus() == BixolonConst.MPOS_STATUS_PRINTER_COVEROPEN){ // printer - Cover Open }else if(e.getStatus() == BixolonConst.MPOS_STATUS_PRINTER_COVEROK){ // printer - Cover OK }else if(e.getStatus() == BixolonConst.MPOS_STATUS_PRINTER_PAPEREMPTY){ // printer - Receipt Paper Empty }else if(e.getStatus() == BixolonConst.MPOS_STATUS_PRINTER_PAPEROK){ // printer - Receipt Paper OK } } }); } |
3 Cashdrawer Open
|
mPosPrinter.openDrawer(BixolonConst.MPOS_CASHDRAWER_PIN2); |